Table of Contents
ToggleA kitchen island isn’t just a prep surface, it’s the centerpiece of the room, a gathering spot, and often the first thing visitors notice. But styling it well requires more than tossing a fruit bowl on the counter. Get it right, and the island anchors the entire kitchen’s design. Get it wrong, and it becomes cluttered chaos. This guide walks through practical techniques to style a kitchen island that balances function and visual appeal, from lighting and storage to texture and color. Whether the island serves as a breakfast bar, a assignments station, or a cocktail mixing zone, these strategies help make it work harder and look better.
Key Takeaways
- How to style a kitchen island successfully requires defining its primary function first—food prep, dining, or work—so décor choices align with actual daily use.
- Layer multiple light sources, including pendant lights hung 30–36 inches above the counter and under-cabinet LED strips, to enhance both function and visual appeal.
- Incorporate natural elements like fresh herbs, wood cutting boards, and high-quality greenery to soften hard kitchen surfaces and add warmth without sacrificing cleanliness.
- Choose stool styles, heights, and metal finishes that match your kitchen’s overall aesthetic while maintaining 10–12 inches of legroom between the seat and counter.
- Create visual balance by adopting a neutral base with colorful, easily swappable accessories—flowers, fruit, linens, and trays—allowing seasonal updates without major redesign.
- Use storage solutions like open shelving, baskets, and wine racks to display essentials while grouping items in odd numbers and leaving at least 24 inches of clear workspace.
Choose the Right Décor for Your Kitchen Island’s Function
Before adding anything decorative, define how the island actually gets used. An island that doubles as a baking station needs different styling than one used primarily for dining or assignments.
Food prep islands benefit from utilitarian accessories: a chef’s knife block, cutting boards stored vertically in a slot, or a ceramic utensil crock near the stove. Keep countertops mostly clear, flour and dough don’t mix well with tchotchkes.
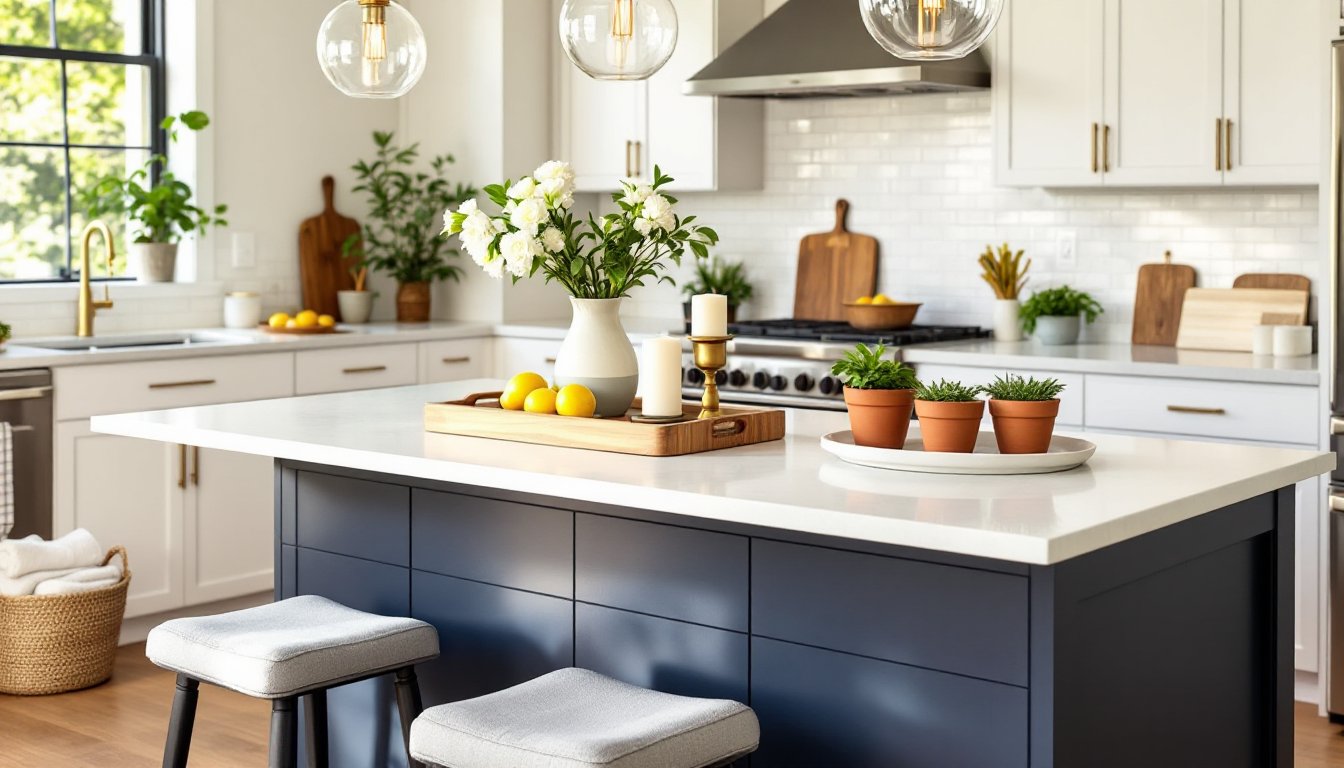
Dining-focused islands allow more decorative freedom. A low centerpiece (8–10 inches tall max) won’t block sightlines across the table. Consider a wooden tray with a small vase and a candle, or a shallow bowl with seasonal fruit. Avoid tall arrangements that force diners to peer around foliage.
Assignments or work-from-home islands need task lighting and minimal distractions. A sleek desk organizer, a small potted succulent, and a charging station blend function with a clean look.
Match décor scale to the island’s size. A 4-foot island gets overwhelmed by a huge statement piece: a 10-foot island looks sparse with a single tiny object. Group items in odd numbers (three candlesticks, five small bowls) for visual interest, and leave at least 24 inches of clear workspace for actual use.
Layer Lighting to Enhance Your Island’s Style
Lighting shapes how an island looks and functions. A single overhead fixture rarely provides enough task light or visual impact. Layering multiple light sources creates depth and flexibility.
Pendant lights are the most common island accent. Hang them 30–36 inches above the countertop for optimal task lighting without blocking views. For an 8-foot island, three evenly spaced pendants work well: for shorter islands, two suffice. Choose fixtures that complement the kitchen’s style, industrial metal shades for modern spaces, glass globes for transitional, or woven rattan for coastal or farmhouse looks.
Dimmer switches are non-negotiable. Bright task lighting works for meal prep: softer ambient light suits evening entertaining. Install a dimmer on the pendant circuit for about $15–30 in parts, a simple DIY swap if the circuit already exists.
Under-cabinet or under-counter lighting adds subtle illumination and highlights the island’s base. LED strip lights (about $20–40 per 16-foot roll) install with adhesive backing and plug into a nearby outlet. They’re especially effective on islands with open shelving or decorative toe kicks.
Accent lighting from nearby sources, like a picture light on adjacent wall art or a table lamp on a nearby console, can visually tie the island into the room’s overall lighting scheme. Avoid over-lighting: too many sources create glare and flatten the space.
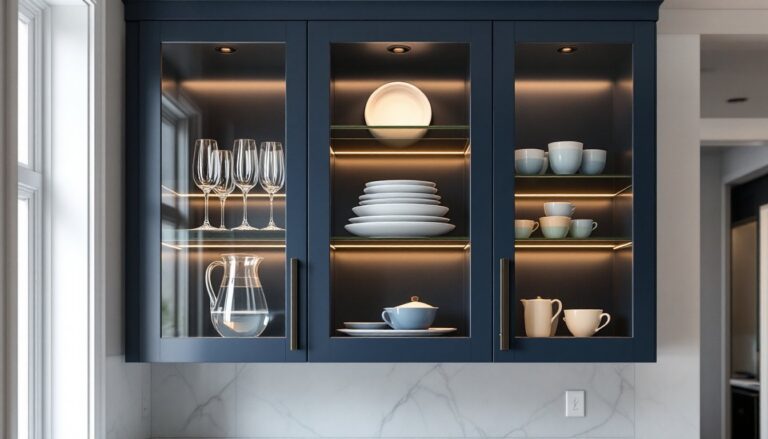
Add Functional Storage and Display Elements
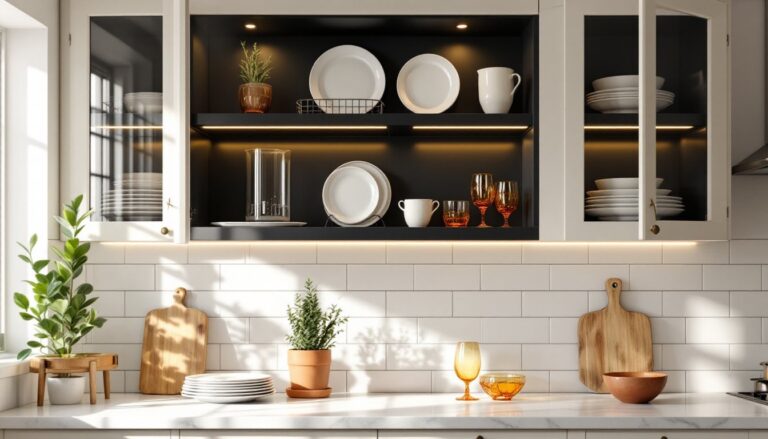
Kitchen islands offer prime real estate for storage that doubles as décor. Open shelving, baskets, and display niches keep essentials accessible while adding texture and personality.
Open shelving on the island’s ends or sides displays cookbooks, mixing bowls, or decorative dishware. Style shelves with a mix of functional and pretty: stack three ceramic bowls, lean a cutting board behind them, and add a small plant or candle. Avoid overcrowding, leave some breathing room.
Baskets and bins corral clutter while adding warmth. Wire baskets suit industrial or modern farmhouse kitchens: woven seagrass or rattan fits coastal or transitional styles. Use them for dish towels, kids’ snacks, or produce that doesn’t need refrigeration (onions, potatoes, bread).
Floating shelves mounted on the island’s back side (the side facing the living area in open-plan layouts) create a display opportunity visible from the main living space. Keep styling minimal: a few ceramics, a small vase, or a framed print.
Built-in wine racks or glass holders integrate storage into the island’s structure. If the island has a wine rack, keep it stocked, empty slots look unfinished. Display a few favorite bottles with labels facing out.
Whatever storage solutions are used, they should reinforce the kitchen’s overall aesthetic. Mismatched baskets in three different materials create visual noise, not charm.
Incorporate Natural Elements and Textures
Kitchens tend toward hard surfaces, stone, metal, tile, so natural elements soften the look and add warmth. Fresh greenery, wood, and organic textures break up the monotony without sacrificing cleanliness.
Fresh herbs in small pots are the ideal kitchen island plant: they’re low-maintenance, smell great, and serve a purpose. Basil, rosemary, and thyme thrive in bright kitchens. Plant them in matching ceramic or terracotta pots (4–6 inches in diameter) and group three together on a tray for cohesion.
Wood elements introduce warmth and contrast. A thick wooden cutting board leaned against the backsplash, a wooden dough bowl filled with lemons, or a live-edge serving board used as a tray all add natural texture. Choose wood tones that complement the island’s finish, lighter woods (maple, ash) suit white or light gray islands: darker walnut or walnut pairs well with navy or charcoal.
Drawing from kitchen design ideas that emphasize natural materials, stone or ceramic vessels add sculptural interest. A hand-thrown pottery vase, a marble mortar and pestle, or a stone fruit bowl contribute organic shapes without feeling overly styled.
Greenery beyond herbs works if there’s enough natural light. A small fiddle-leaf fig or pothos in a 6–8 inch planter adds life, but avoid plants that shed leaves or attract pests. Faux greenery is acceptable if it’s high-quality, cheap plastic plants look worse than no plants.
Keep natural elements clean and fresh. Wilted herbs or dusty faux stems undermine the whole aesthetic.
Style Your Island with Seating and Accessories
If the island includes seating, stools or chairs become part of the styling equation. Their material, height, and placement affect both function and appearance.
Stool height depends on the counter. Standard 36-inch counters need 24-inch seat-height stools (counter height): 42-inch bar-height counters need 30-inch seat-height stools. Leave 10–12 inches between the seat and the underside of the counter for legroom.
Stool style should complement the kitchen’s aesthetic. Metal stools with wood seats fit industrial or modern farmhouse: upholstered stools in leather or linen suit traditional or transitional: acrylic or molded plastic works in contemporary spaces. Match metal finishes to the kitchen’s hardware and fixtures, brushed nickel stools with brushed nickel cabinet pulls, oil-rubbed bronze with matching faucets.
Many home design resources highlight the impact of cohesive seating choices on overall kitchen flow and visual continuity.
Seat cushions add comfort and color but require maintenance. Choose wipeable fabrics or treated textiles if kids or messy eaters use the island. Cushions should be 2–3 inches thick for comfort without excessive height.
Accessories around seating include placemats or a table runner if the island doubles as a dining surface. A runner down the island’s center (14–18 inches wide) defines the dining zone without interfering with workspace. Use washable cotton or linen: avoid delicate fabrics in high-traffic kitchens.
Decorative trays corral smaller accessories, salt and pepper mills, napkin holders, a small vase, so they’re easy to move when workspace is needed. Choose trays in materials that echo the island or surrounding finishes: a marble tray on a butcher-block island, a wooden tray on quartz, or a metal tray on soapstone.
Create Visual Balance with Color and Contrast
Color and contrast determine whether an island feels intentional or haphazard. Styling should either harmonize with the kitchen’s palette or introduce a deliberate accent.
Monochromatic schemes use varying shades of one color. A white kitchen with a white island might incorporate ivory ceramics, cream linens, and light wood for subtle depth. This approach feels calm and cohesive but risks looking flat without enough texture.
Complementary contrast pairs the island’s color with opposite hues on the color wheel. A navy island looks striking with warm brass accessories and burnt orange accents: a sage green island pops against terracotta pots and copper bowls.
Neutral with pops of color is the safest route for most DIYers. Keep the base neutral, white, gray, natural wood, and introduce color through easily swapped accessories: a vase of fresh flowers, a bowl of bright citrus, colorful dish towels, or a patterned table runner. This allows seasonal or mood-based changes without repainting.
For additional styling inspiration and visual ideas, kitchen island design galleries showcase balanced color applications across various styles and budgets.
Material contrast adds visual interest. Pair matte finishes with gloss (a matte ceramic vase on a polished quartz counter), rough textures with smooth (a woven basket next to sleek metal stools), or organic shapes with geometric (a rounded pottery bowl beside square placemats).
Avoid clashing metals. Stick to one or two metal finishes across lighting, hardware, and accessories, mixing five different metals (brass, copper, chrome, nickel, black iron) looks chaotic, not eclectic.
Conclusion
Styling a kitchen island is about balancing beauty with utility. The best-styled islands don’t just look good in photos, they work hard every day without becoming cluttered or impractical. Start with function, layer in lighting and texture, and refine with color and contrast. Swap out small accessories seasonally to keep the look fresh without a full redesign. A well-styled island elevates the entire kitchen and makes daily tasks more enjoyable.