Table of Contents
ToggleGlass kitchen cabinets aren’t just for showing off grandma’s china anymore. They’re a practical way to add depth, light, and personality to your kitchen, assuming you know how to style them properly. A poorly curated glass cabinet looks cluttered and chaotic. A well-styled one becomes a focal point that elevates the whole room. The difference comes down to intentional editing, smart arrangement, and understanding a few basic design principles. Whether you’re working with existing glass-front cabinets or planning to install them, this guide walks through exactly how to make them look sharp without turning your kitchen into a display case at a thrift store.
Key Takeaways
- Glass kitchen cabinets enhance light and openness while encouraging organization, but only work well when thoughtfully styled and curated down to 60-70% capacity.
- Show only items you use regularly or love—matching dishes, attractive glassware, and heirloom pieces—while hiding mismatched containers and rarely-used items in solid cabinets.
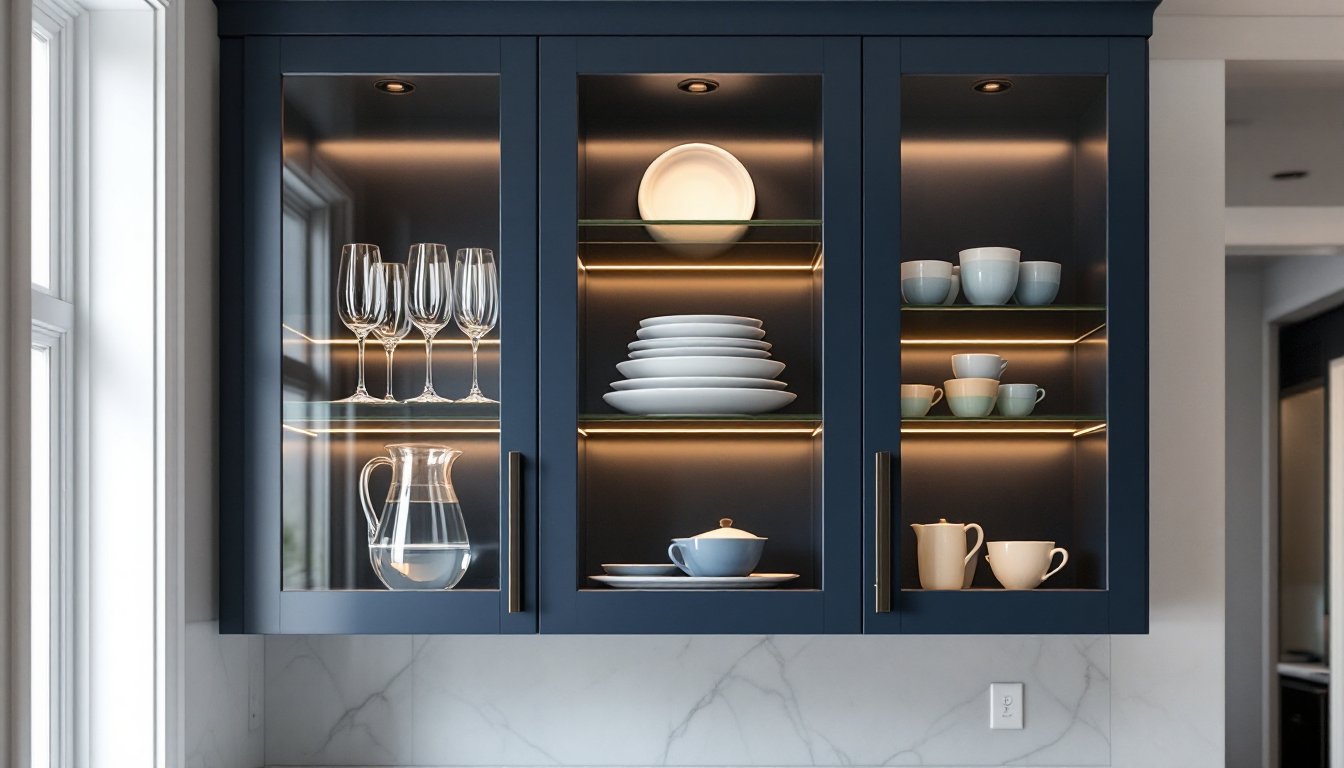
- Use color coordination, height variation, and the rule of thirds to arrange items intentionally; avoid even numbers and pair neutral bases with accent colors for visual balance.
- Install LED strip lighting along shelf undersides with warm white tones to transform glass cabinets into design features that reflect light and create ambiance.
- Commit to weekly glass cleaning, monthly dusting of items, and quarterly deep cleaning to manage maintenance—the effort becomes manageable once clutter is eliminated.
Why Glass Kitchen Cabinets Are a Smart Design Choice
Glass-front cabinets offer functional advantages beyond aesthetics. They force you to stay organized, nothing hides behind opaque doors, which means you’ll actually use what you own instead of buying duplicates. They also reflect light, making smaller kitchens feel more open without knocking down walls.
From a practical standpoint, glass cabinets make frequently used items easier to locate. You won’t dig through stacks of plates to find the right serving bowl. That visibility saves time during meal prep and cleanup.
They work particularly well in kitchens with limited natural light. The transparency allows ambient light to penetrate deeper into upper cabinet space, reducing the cave-like feeling that solid doors create. Many designers at The Kitchn recommend pairing glass fronts with interior cabinet lighting to maximize this effect.
Glass cabinets also create vertical interest. When styled thoughtfully, they draw the eye upward and break up monotonous runs of solid cabinetry. This makes standard 8-foot ceilings feel taller and adds architectural detail without remodeling.
Curate Your Display: What to Show and What to Hide
The biggest mistake people make with glass cabinets is treating them like regular storage. Not everything deserves display space.
What works behind glass:
- Matching dish sets or coordinated collections
- Glassware that catches light (wine glasses, cut crystal, colored glass)
- Vintage or heirloom pieces with visual interest
- Cookbooks with attractive spines
- Ceramics with interesting shapes or textures
- Items you use regularly so the display stays fresh
What to keep in solid cabinets:
- Mismatched plastic storage containers
- Chipped or stained dishware
- Appliance manuals and kitchen paperwork
- Rarely used serving pieces that gather dust
- Anything you don’t want to clean regularly
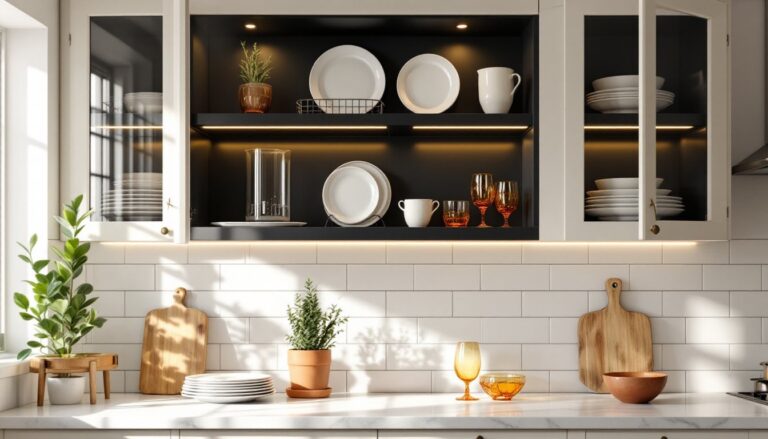
Edit ruthlessly. A half-empty glass cabinet styled with intention looks exponentially better than one crammed full of random items. Aim to fill roughly 60-70% of the available space. This breathing room prevents visual clutter and lets individual pieces stand out.
Consider rotating displays seasonally. Store holiday serving pieces during off-months and swap in everyday items. This keeps the look dynamic without requiring a complete cabinet overhaul.
Color Coordination and Visual Balance Techniques
Color discipline makes the difference between intentional and accidental-looking displays. Pick a cohesive palette and stick to it.
Monochromatic approaches work reliably. All-white dishes create a clean, cohesive look that suits nearly any kitchen style. Alternatively, commit to a single accent color, blues, greens, or warm earth tones, and let that unify your display.
Two-tone strategies offer more flexibility. Pair neutral bases (white, cream, gray) with one accent color. This gives you room for variety while maintaining visual order.
Balance weight and visual density across shelves. Place heavier, darker items on lower shelves and lighter, more delicate pieces up top. This follows natural visual logic and makes cabinets feel stable rather than top-heavy.
Group items in odd numbers when possible. Three matching bowls or five small plates read as intentional arrangements. Even numbers often look paired rather than curated.
If your cabinet backs are visible, paint them a contrasting color. Deep blues, soft grays, or even black create backdrop contrast that makes displayed items pop. Use semi-gloss or satin finish paint for easier cleaning. This technique appears frequently in glass-front cabinet styling because it adds instant depth.
Lighting Strategies to Enhance Your Glass Cabinets
Lighting transforms glass cabinets from functional storage into genuine design features. Without it, you’re only getting half the benefit.
LED strip lights installed along the underside of each shelf create even, shadow-free illumination. Choose warm white (2700-3000K) for kitchens with warm-toned wood or neutral white (3500-4100K) for contemporary spaces with cooler palettes. Avoid daylight-spectrum bulbs, they create harsh, clinical lighting unsuitable for residential kitchens.
Installation is straightforward. Most LED strips run on 12V systems with adhesive backing. Mount them toward the front edge of each shelf so light washes down over displayed items. Wire them through small holes drilled in cabinet sides or backs, connecting to a single transformer hidden above the cabinet run.
For retrofits without easy electrical access, battery-operated puck lights work as alternatives. They require periodic battery changes but eliminate wiring challenges. Space them 12-16 inches apart for even coverage.
Dimmer switches add flexibility. Full brightness works for task lighting while cooking: dimmed lighting creates ambiance during dinner.
If you’re remodeling, run electrical to cabinet locations before installing cabinetry. It’s exponentially easier than retrofitting later and allows hardwired fixtures with wall switches.
Consider how external lighting interacts with glass cabinets. Pendant lights hung nearby will reflect in glass doors. Position them to create attractive reflections rather than glare that obscures the contents.
Organizing and Arranging Items for Maximum Impact
Arrangement separates professional-looking displays from haphazard storage.
Start with height variation. Place tall items (vases, pitchers, tall glasses) at the back or ends of shelves. Medium-height pieces go in the middle ground, with shorter items forward. This creates depth and ensures everything remains visible.
Use the rule of thirds. Divide each shelf into three visual zones. Place focal items at the intersection points rather than dead center. This natural composition technique, borrowed from photography, creates more dynamic arrangements than centering everything.
Stack strategically. Plates, bowls, and saucers stack neatly, but limit stacks to 4-6 items maximum. Taller stacks become unstable and visually heavy. Offset stacks slightly rather than aligning them in rigid columns.
Create breathing room. Leave 2-3 inches between distinct groupings. This negative space prevents displays from reading as cluttered and helps the eye distinguish individual elements.
Group by function or theme. Keep all glassware together, all serving pieces together, or create vignettes around specific uses (tea service, cocktail setup, baking display). This organizational logic makes cabinets both beautiful and functional.
For cabinets with adjustable shelves, customize spacing to fit your tallest pieces without wasting vertical space. Shelves set at 10-12 inch intervals accommodate most dinnerware and glassware efficiently. Many home design resources recommend measuring your tallest items before finalizing shelf positions to avoid awkward gaps.
Maintaining and Cleaning Glass Cabinet Displays
Glass cabinets require more maintenance than solid doors. Accept this upfront or you’ll fight a losing battle against fingerprints and dust.
Clean glass doors weekly. Use a microfiber cloth with glass cleaner or a 50/50 vinegar-water solution. Spray cleaner on the cloth, not the glass, to prevent drips into cabinet hardware. Wipe in vertical strokes on one side, horizontal on the other, this shows which side has remaining streaks.
Dust displayed items monthly. Remove everything, wipe shelves with a damp cloth, then dust each piece before replacing it. This sounds tedious, but it goes faster than you’d expect, typically 15-20 minutes per cabinet.
Deep clean quarterly. This includes cleaning cabinet interiors, painted backs, and any lighting fixtures. Check LED connections and replace any failing strips or puck lights.
Address fingerprints immediately on cabinet exteriors. The oils set over time and become harder to remove. Keep a microfiber cloth in a drawer near glass cabinets for quick wipe-downs.
If you’ve got kids, accept that lower glass cabinets will show more wear. Either place them higher (above 48 inches from the floor) or choose textured or seeded glass that camouflages fingerprints better than clear glass.
Use shelf liners to protect surfaces and simplify cleaning. Non-slip drawer liners work well, they’re thin enough not to show through glass but grippy enough to prevent items from sliding. Cut them to size with scissors or a utility knife.
Conclusion
Glass kitchen cabinets reward thoughtful curation and regular upkeep. Edit your displays down to pieces you genuinely use or love, maintain visual balance through color and spacing, and add lighting to turn storage into a design feature. The extra maintenance becomes manageable when you’re not constantly reorganizing clutter behind glass. Done right, they’re one of the most cost-effective ways to add character and openness to a kitchen without major construction.