Table of Contents
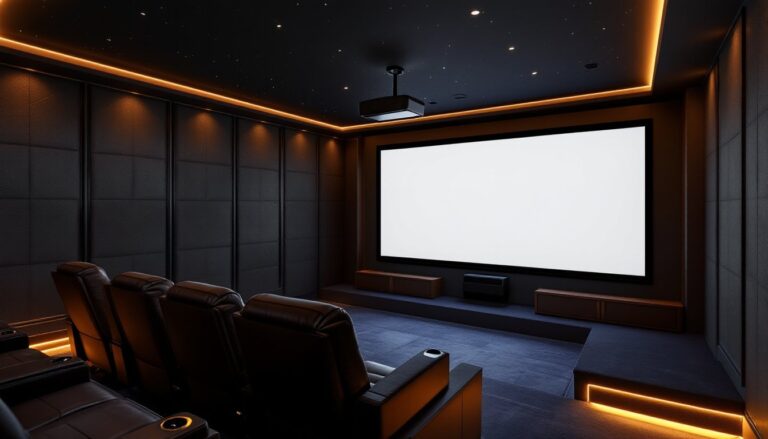
ToggleBuilding a home theater isn’t just about a big screen and surround sound speakers. Without proper acoustic treatment, even premium equipment sounds muddy, boomy, or hollow. Sound waves bounce off bare walls, ceilings, and hard floors, creating echoes and cancellations that destroy clarity and immersion. The difference between an untreated room and one with strategic acoustic control is night and day, dialogue becomes crisp, bass tightens up, and the soundstage opens. Acoustic treatment doesn’t require a complete remodel or a contractor. With the right materials and placement, homeowners can tackle these upgrades themselves and hear results immediately.
Key Takeaways
- Home theater acoustic treatment eliminates reflections and standing waves that muddy dialogue and distort sound, making it as important as premium equipment itself.
- Start with affordable DIY rigid fiberglass panels for first reflection points—costing just $15–25 per 2×4-foot panel—to immediately improve clarity and soundstage.
- Corner bass traps using 4–8 inch thick fiberglass are essential for controlling low-frequency buildup and ensuring even bass response across all seating positions.
- Strategic placement guided by a mirror test (finding first reflection points on side walls and ceiling) delivers far better results than random symmetric coverage.
- Avoid over-treating your room; aim for controlled reflections rather than anechoic conditions, and measure response with tools like REW before adding more panels.
- Budget-friendly alternatives like heavy curtains, area rugs, and layered furniture provide supplemental absorption, but thin foam panels should be avoided due to poor low-frequency performance.
Why Acoustic Treatment Matters for Your Home Theater
Sound behaves differently indoors than outdoors. In an enclosed room, audio waves reflect off surfaces, creating a complex pattern of reflections that reach the listener’s ears at slightly different times. These reflections cause comb filtering, phase cancellation, and standing waves, all of which blur detail and distort frequency response.
In typical living rooms or basements converted to theaters, hard surfaces dominate: drywall, hardwood or tile floors, glass windows, and flat ceilings. These materials reflect sound instead of absorbing it, creating flutter echo (rapid repetitive reflections) and excessive reverberation time. The result is dialogue that sounds hollow, bass that booms unevenly across seating positions, and a soundstage that collapses into the speakers instead of filling the room.
Acoustic treatment addresses these issues by controlling reflections, absorbing excess energy, and evening out frequency response. It doesn’t soundproof the room from outside noise, that’s a separate process involving mass and isolation. Treatment optimizes the sound inside the space. Properly treated rooms let listeners hear what’s actually in the soundtrack, not the room’s acoustic signature layered on top.
Even modest treatment, first reflection points and corner bass traps, produces audible improvements. Many enthusiasts following guides on platforms like Digital Trends for home theater setups often overlook acoustics, focusing only on equipment, but the room itself is the biggest component in the signal chain.
Understanding Common Sound Problems in Home Theaters
Flutter echo occurs when sound bounces rapidly between two parallel hard surfaces, like facing walls or floor and ceiling. Clap your hands in an untreated room, if you hear a metallic ringing tail, that’s flutter echo. It smears transient detail and makes soundtracks sound cheap.
Standing waves develop at specific frequencies where the room dimensions create reinforcement or cancellation. Bass frequencies with wavelengths that match room dimensions (length, width, height) build up in corners and null out at other spots. This causes boomy bass in one seat and thin bass two feet away. Room modes are mathematically predictable but vary by dimensions, an 18 Hz mode in one room might be 24 Hz in another.
First reflections are the initial bounces off walls, ceiling, and floor that reach the listener shortly after the direct sound from the speakers. These early reflections confuse the brain’s ability to localize sound and collapse the stereo or surround image. Treating first reflection points is the highest-impact upgrade for most rooms.
Excessive reverberation happens when reflected energy lingers too long. Movie soundtracks are mixed in acoustically controlled dubbing stages with short decay times. Playing them back in a room with a two-second reverb tail muddies everything. Target reverberation time (RT60) for home theaters is typically 0.3 to 0.5 seconds, depending on room size.
Identifying which problems dominate in a given space helps prioritize treatment. Bass issues require different solutions than midrange reflections, and tackling both systematically delivers the best results.
Essential Acoustic Treatment Materials and Solutions
Acoustic Panels and Wall Treatments
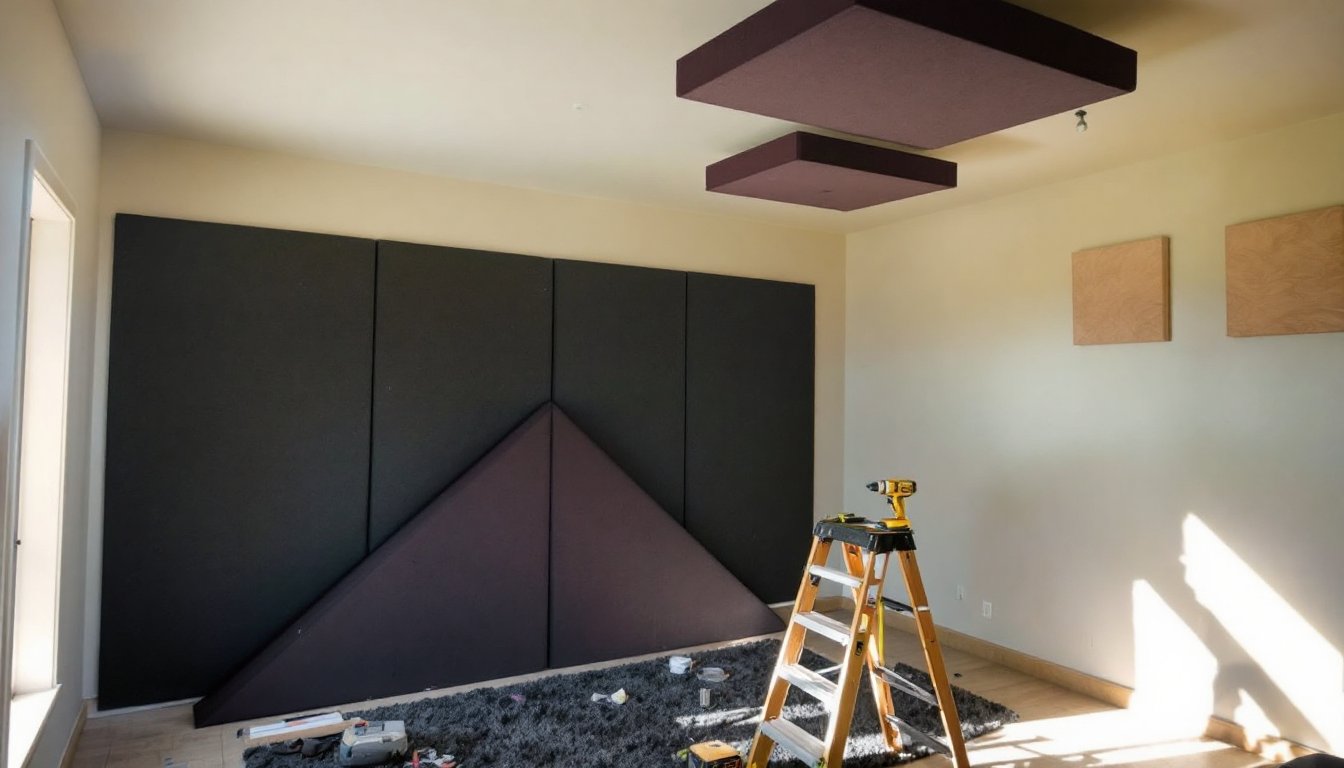
Rigid fiberglass panels (2-inch or 4-inch thick) are the workhorse of acoustic treatment. Products like Owens Corning 703 or Roxul (mineral wool) offer high absorption coefficients across mid and high frequencies. These panels mount directly to walls or ceilings using Z-clips, impaling clips, or adhesive. Wrapping them in acoustically transparent fabric (guilford of maine, speakers grill cloth) makes them visually acceptable.
Two-inch panels work well for first reflections and general wall coverage. Four-inch panels provide deeper absorption, especially into lower midrange frequencies. Spacing panels a few inches off the wall (using furring strips or standoffs) increases low-frequency effectiveness by creating an air gap.
Foam panels are cheaper but far less effective than fiberglass. Thin foam (1-inch) barely absorbs below 1 kHz and degrades over time. If budget is tight, foam can address flutter echo in small doses, but it won’t control bass or provide broadband absorption.
Fabric-wrapped panels offer aesthetic flexibility. Homeowners can match room décor while hiding industrial-looking fiberglass. DIY panel construction is straightforward: build a wooden frame from 1×4 furring strips, cut fiberglass to fit, wrap with fabric, and staple. Total material cost runs $15–25 per 2×4-foot panel.
Diffusers scatter sound instead of absorbing it, preserving energy while eliminating specular reflections. Quadratic residue diffusers (QRD) and skyline diffusers work well on rear walls behind the listening position. They’re more complex to build than absorbers and typically cost $100–300 commercially. For most home theaters, absorption handles the bulk of treatment needs: diffusion is secondary.
Bass Traps and Low-Frequency Control
Corner bass traps are essential because low-frequency energy accumulates in room corners. Thick fiberglass or mineral wool panels (at least 4 inches, ideally 6–8 inches) placed floor-to-ceiling in corners absorb bass more effectively than wall-mounted panels. Tri-corner traps (spanning the vertical corner) and soffit traps (across ceiling-wall junctions) maximize absorption in problem zones.
Membrane absorbers use a vibrating panel (thin plywood or MDF) mounted over an air cavity to absorb specific low frequencies. Also called panel traps, they’re tunable by adjusting cavity depth and panel mass. More complex to build than fiberglass traps, but effective when targeting narrow frequency ranges.
Helmholtz resonators (tuned port traps) absorb narrow bass frequencies using a cavity and port. These require precise tuning and are less common in DIY applications. For most homeowners, thick porous absorbers in corners deliver better bang-for-buck.
Bass trapping is the hardest part of acoustic treatment because low frequencies require substantial material mass and thickness. Many budget home theater builds skip bass traps entirely, but they’re non-negotiable for even bass response across seating.
Subwoofer placement also affects bass modes. Placing the subwoofer at multiple locations (corner, midwall, etc.) and measuring response with an SPL meter or room correction software helps identify the smoothest position. Dual subwoofers in opposing locations can average out room modes, though treatment remains necessary.
Strategic Placement Guide for Maximum Impact
Start with first reflection points on side walls. Sit in the primary listening position and have a helper slide a mirror along the side wall. When the mirror reflects the front left or right speaker, mark that spot, it’s a first reflection point. Mount a 2-inch or 4-inch acoustic panel there. Repeat for the other side and the ceiling reflection points above the listener.
Treat front wall corners with floor-to-ceiling bass traps. These absorb low-frequency buildup and some midrange energy. If the front wall is behind the screen or speakers, adding broadband absorption across the wall (between and around speakers) reduces early reflections and speaker boundary interference.
Address the rear wall behind the seating. Options include absorption, diffusion, or a combination. Absorption deadens the rear reflections: diffusion scatters them for a more spacious feel without excessive deadness. A hybrid approach, absorbers at ear level, diffusers above and below, works well.
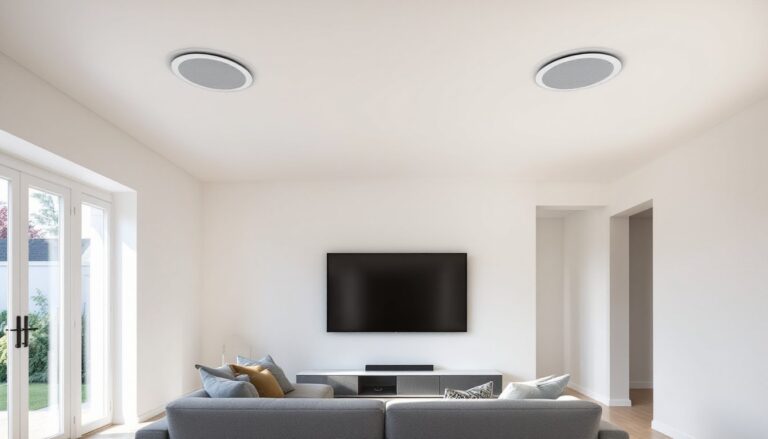
Treat ceiling reflections between the speakers and listening position. Acoustic clouds (panels suspended horizontally) or direct-mount ceiling panels reduce early reflections that collapse the soundstage. This matters especially for Dolby Atmos or height channels, where ceiling reflections interfere with overhead imaging.
Don’t over-treat. A completely dead room sounds unnatural and fatiguing. Aim for controlled reflections, not anechoic conditions. Leave some surfaces reflective (often the rear third of side walls or portions of the ceiling) to maintain a sense of space. Measure room response with a calibrated microphone and software like REW (Room EQ Wizard) to guide treatment placement instead of guessing.
Avoid placing absorbers directly behind speakers unless controlling boundary gain. The goal is to manage the sound reaching the listener, not to deaden the entire room uniformly. Strategic, asymmetric placement often outperforms symmetric coverage.
Budget-Friendly DIY Acoustic Treatment Projects
DIY rigid fiberglass panels are the most cost-effective treatment. Materials for a 2×4-foot, 2-inch-thick panel:
- Owens Corning 703 or Roxul Safe’n’Sound insulation (2-inch thickness): $1.50–2.50 per square foot
- 1×4 pine furring strips for frame: $3–5 per panel
- Acoustically transparent fabric: $2–4 per square foot (buy in bulk rolls)
- Spray adhesive or staples for fabric attachment: $10–15 for supplies covering many panels
Total cost per panel: $15–25. Build a dozen panels for $180–300, enough for first reflections and modest bass trapping.
Construction steps:
- Cut furring strips to form a 2×4-foot frame (actual dimensions 23×47 inches to match insulation batts).
- Assemble frame with wood glue and brad nails or screws.
- Cut fiberglass batt to fit frame snugly.
- Stretch fabric over front, wrapping edges to the back, and staple taut.
- Mount using Z-clips, Command strips (for lightweight panels), or screws with washers into wall studs.
Safety: Wear gloves, long sleeves, dust mask, and safety glasses when cutting and handling fiberglass. Particles irritate skin and lungs. Work in a ventilated area.
Corner bass traps can be built similarly using thicker material (4–6 inches) and triangular frames to fit room corners. Stackable corner traps (built in 2-foot sections) simplify installation in 8-foot-tall rooms.
Fabric-wrapped plywood diffusers offer a step up. Build a simple geometric pattern (varied depth squares or slats) from plywood, then wrap with fabric. Less effective than scientifically designed QRD diffusers, but better than bare walls.
Rockwool in floor joists: For basement theaters with exposed joists, fill joist bays with Rockwool batts before installing drywall ceiling. This adds mass and absorption without consuming interior space. Consult Fine Homebuilding resources for framing best practices if modifying structural elements.
Heavy curtains over windows or along bare walls provide modest midrange absorption at low cost. Layered, pleated curtains (velvet or thick cotton) outperform thin drapes. Not as effective as rigid panels, but a quick partial solution.
Furniture and rugs contribute minor absorption. A thick area rug over hardwood or concrete reduces floor reflections. Bookshelves filled with books provide some diffusion and absorption. These aren’t substitutes for dedicated treatment but support overall acoustics.
Avoid decorative “acoustic foam” kits marketed for studios unless they’re at least 2 inches thick and made from open-cell foam with published absorption coefficients. Most cheap foam does little beyond placebo.
Testing and iteration: After installing initial treatment, play familiar content and listen for improvements. Measure with REW if possible, frequency response graphs reveal remaining issues. Add treatment incrementally: it’s easier to add panels than remove excess.