Table of Contents
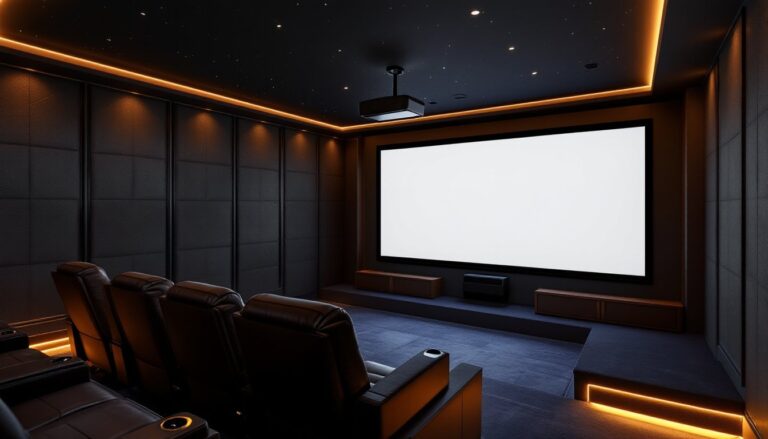
ToggleIn-wall speakers deliver theater-quality audio without the clutter of floor-standing towers or bulky bookshelf units. They disappear into your walls, freeing up floor space while delivering the kind of immersive surround sound that turns a living room into a true home theater. Whether you’re wiring a new build or retrofitting an existing room, in-wall speakers offer a clean, permanent solution that increases home value and elevates every movie night. This guide walks through everything needed to choose, plan, and install in-wall speakers the right way.
Key Takeaways
- In-wall speakers deliver immersive home theater sound while freeing up floor space and improving your home’s resale value with a clean, invisible aesthetic.
- Proper placement of in-wall speakers—front channels at ear level, surrounds 6–7 feet high, and Atmos speakers in the ceiling—is essential for authentic surround sound performance.
- Speaker driver size, sensitivity rating, frequency response, and impedance must match your AV receiver’s capabilities and wall cavity dimensions for optimal audio quality.
- Always use CL2 or CL3-rated speaker wire of the correct gauge, verify polarity connections, and follow local building codes to ensure safety and compliance with fire regulations.
- Common installation mistakes like reversing polarity, skipping backboxes, and mounting surrounds too low significantly degrade home theater sound quality and should be avoided.
Why Choose In-Wall Speakers for Your Home Theater?
In-wall speakers mount flush with drywall, leaving only a grille visible, or paintable for near-invisibility. This makes them ideal for dedicated home theaters, multipurpose family rooms, or any space where aesthetics matter as much as sound.
They offer several practical advantages. First, floor space stays clear, which matters in smaller rooms or homes with kids and pets. Second, speaker placement becomes flexible. Surround and height channels can be positioned exactly where Dolby Atmos or DTS:X specifications call for them, without wrestling with stands or wall mounts. Third, resale value improves. A properly installed in-wall system is a selling point, especially in higher-end homes.
The trade-off is installation effort. Unlike plug-and-play soundbars or powered speakers, in-wall models require cutting into drywall, running speaker wire, and sometimes adding blocking or back boxes. They’re permanent, once installed, relocating them means patching and repainting. But for homeowners planning to stay put or building new construction, the clean look and immersive sound outweigh the initial labor.
Types of In-Wall Speakers and Where to Place Them
Not all in-wall speakers serve the same role. A home theater system typically uses multiple types, each optimized for specific channels.
LCR (Left, Center, Right) speakers handle the front soundstage. The center channel carries dialogue, so prioritize clarity and midrange accuracy. Left and right channels handle music, effects, and stereo imaging. Many manufacturers offer dedicated center-channel in-wall models with horizontally aligned drivers to fit above or below a TV.
Surround speakers mount on side or rear walls to create ambient effects and directional cues. They don’t need the same bass extension as front speakers, so smaller 6.5-inch or 5.25-inch models often suffice. Dipole or bipole designs work well for surround channels, dispersing sound more diffusely than direct-firing models.
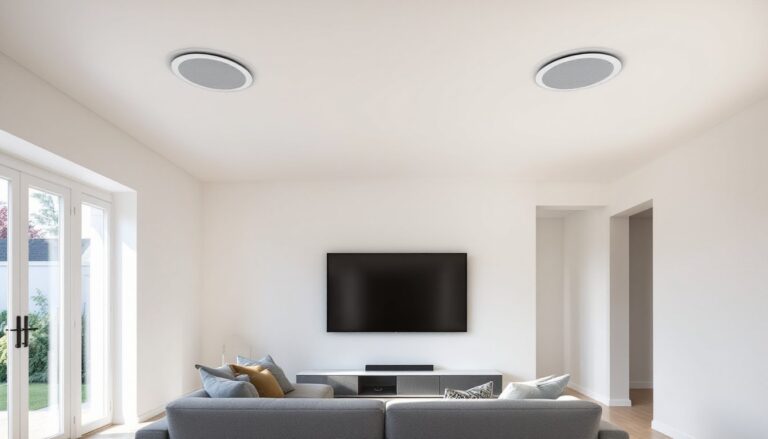
Height or Atmos speakers mount in the ceiling to deliver overhead effects for immersive formats like Dolby Atmos. Angled drivers help direct sound toward the listening position. If ceiling mounting isn’t possible, some in-wall speakers feature upward-firing drivers designed to reflect sound off the ceiling.
Front Stage and Surround Sound Speakers
The front stage (left, center, right) carries most of the sonic workload. Position the left and right speakers at ear level, flanking the TV at equal distances. The center channel mounts directly above or below the screen, aimed at the primary seating area. Use speakers with matching tweeters and crossover designs across all three to ensure tonal consistency.
Surround speakers depend on the format. For 5.1 systems, place surrounds 90–110 degrees to the sides of the main listening position, slightly above ear level. For 7.1, add rear surrounds 135–150 degrees behind the listener. Dolby Atmos configurations add ceiling or height speakers, typically four for a 5.1.4 setup. Space them symmetrically, one pair in front of the seating area and one pair behind, angled toward listeners. Consult expert reviews on placement to fine-tune positioning for your room’s acoustics.
Key Features to Look for When Buying In-Wall Speakers
Driver size affects bass response and overall output. 8-inch woofers deliver deeper bass and higher volume but require more wall depth (typically 3.5 to 4 inches). 6.5-inch drivers fit shallower walls and still provide solid midrange and adequate bass for surround channels. Check the mounting depth specification against your wall cavity, standard 2×4 framing offers about 3.5 inches of clearance, while 2×6 walls give 5.5 inches.
Sensitivity (measured in dB at 1 watt/1 meter) indicates efficiency. Speakers rated 89 dB or higher play louder with less amplifier power, which matters if pairing with a modest AV receiver. Lower-sensitivity models (85–87 dB) demand more wattage but often deliver tighter bass and smoother frequency response.
Frequency response tells you the range of sound the speaker reproduces. Look for models extending down to at least 50–60 Hz for front channels: surrounds can get by with 80 Hz if paired with a subwoofer. High-frequency extension to 20 kHz ensures crisp detail.
Pivoting tweeters let you aim the tweeter toward the listening position after installation, compensating for off-axis mounting. This feature is invaluable for surround speakers mounted high on side walls.
Paintable grilles blend into walls and ceilings. Magnetic grilles simplify removal for tweeter adjustment or future service.
Backboxes aren’t always included but improve performance. They isolate the speaker from adjacent rooms, reduce sound transmission, and tighten bass response by controlling the airspace behind the driver. Some top-rated models come with optional or integrated back boxes.
Match impedance (typically 8 ohms or 4 ohms) to your receiver’s specifications. Most AV receivers handle 8-ohm loads easily: 4-ohm speakers can draw more current and may require a more robust amplifier.
Planning Your In-Wall Speaker Installation
Planning prevents costly mistakes. Start by mapping out speaker locations on your floor plan, accounting for stud spacing and electrical or HVAC obstacles.
Use a stud finder to locate wall framing. In-wall speakers typically mount between studs spaced 16 or 24 inches on center. Measure the speaker’s cutout diameter (common sizes are 8.5, 7.5, or 6.5 inches) and confirm there’s clearance. Mark the center point for each speaker at the desired height, ear level (around 42 inches) for front channels, 6–7 feet for surrounds.
Check for obstructions inside the wall: electrical wiring, plumbing, HVAC ducts, or fire blocking. Use a non-contact voltage tester before cutting into any wall. If you encounter wiring, relocate the speaker or call an electrician.
Running speaker wire is easier during new construction, but retrofitting is doable. Use 16-gauge or 14-gauge CL3-rated speaker wire for in-wall runs. CL3 (Class 3) or CL2 wire meets National Electrical Code (NEC) fire safety requirements for in-wall installation. For longer runs (over 50 feet), step up to 12-gauge to minimize resistance.
Fish wire from the AV receiver location to each speaker cutout using a fish tape or flexible drill bit. In finished walls, cut small access holes at the top plate or use existing outlet boxes as wire pathways. Label each wire at both ends to avoid confusion during hookup.
If installing in a multi-story home or through fire-rated walls, check local building codes. Some jurisdictions require fire-rated speaker enclosures or special sealants around cutouts. Obtain permits for any work that involves structural changes or modifications to fire-rated assemblies.
How to Install In-Wall Speakers: A DIY Step-by-Step Overview
Installing in-wall speakers is a manageable DIY project if you’re comfortable with basic carpentry and electrical work. Here’s the general process:
-
Gather tools and materials: Drywall saw or jab saw, stud finder, level, pencil, fish tape, wire strippers, voltage tester, safety glasses, and dust mask. Have a vacuum handy, cutting drywall creates fine dust.
-
Mark the cutout: Use the included template or trace the speaker’s mounting bracket onto the wall. Double-check the location with a stud finder and level. Drill a small pilot hole first and probe inside with a bent coat hanger to confirm the cavity is clear.
-
Cut the opening: Use a drywall saw to cut along the traced line. Keep the saw blade shallow to avoid hitting anything behind the drywall. Save the cutout piece, it can help patch mistakes if needed.
-
Run and connect speaker wire: Feed the wire through the cutout. Strip about 1/2 inch of insulation from each conductor. Most in-wall speakers use spring-loaded terminals or binding posts. Match polarity: positive (+) to positive, negative (−) to negative. Reversed polarity causes phase issues and weak bass.
-
Install the speaker: Insert the speaker into the cutout. Tighten the dog-ear clamps or rotating tabs until the speaker is snug and flush with the wall surface. Don’t overtighten, you can crack drywall or warp the frame.
-
Adjust the tweeter: If the speaker has a pivoting tweeter, aim it toward the primary listening position. This is especially important for off-axis surrounds.
-
Attach the grille: Snap or magnet-mount the grille into place. If painting, remove the grille, apply thin coats of latex paint, and let it dry fully before reinstalling.
-
Test the system: Power up the AV receiver and run the auto-calibration routine (Audyssey, YPAO, Dirac, etc.). Check each channel for proper output and phase. Listen for distortion, rattles, or imbalance.
For detailed guidance on choosing installation-friendly models, consult expert testing and reviews that evaluate ease of setup alongside sound quality.
Safety reminder: Always wear safety glasses and a dust mask when cutting drywall. Turn off power to nearby electrical circuits before cutting into walls.
Common Mistakes to Avoid with In-Wall Home Theater Speakers
Skipping the stud finder. Cutting into a stud ruins the drywall and the speaker. Always scan for framing before marking cutouts.
Ignoring wire gauge and type. Using lamp cord or non-rated wire violates NEC code and creates a fire hazard. Stick with CL2 or CL3-rated speaker wire in the correct gauge for the run length.
Reversing polarity. Miswired speakers cancel bass frequencies and create a hollow sound. Double-check positive and negative connections at both the receiver and speaker ends.
Mounting surrounds too low. Surround speakers placed at ear level or below can sound harsh and localized. Aim for 6–7 feet high, angled slightly downward.
Forgetting insulation. Adding fiberglass batt insulation behind in-wall speakers improves bass response and reduces sound transmission to adjacent rooms. It’s a cheap upgrade that makes a noticeable difference.
Painting grilles without removal. Spraying paint directly onto installed grilles clogs the mesh and muffles high frequencies. Always remove grilles, apply light coats, and let them dry before reinstalling.
Overlooking AV receiver power. Pairing low-sensitivity speakers (85 dB) with an underpowered receiver (50 watts per channel) results in weak, distorted sound at higher volumes. Match speaker sensitivity and impedance to your amplifier’s capabilities.
Cutting corners on backboxes. Skipping backboxes to save money reduces sound quality and allows audio to bleed into adjacent rooms. Invest in enclosures for critical channels like the center and fronts.
By planning carefully, using the right materials, and following code requirements, homeowners can achieve a professional-grade in-wall home theater installation that delivers clean, room-filling sound for years to come.